Blog

  • Boston Cream Pie: Massachusetts’ Official Dessert (That’s Actually a Cake)

    free app for traking food calories link here

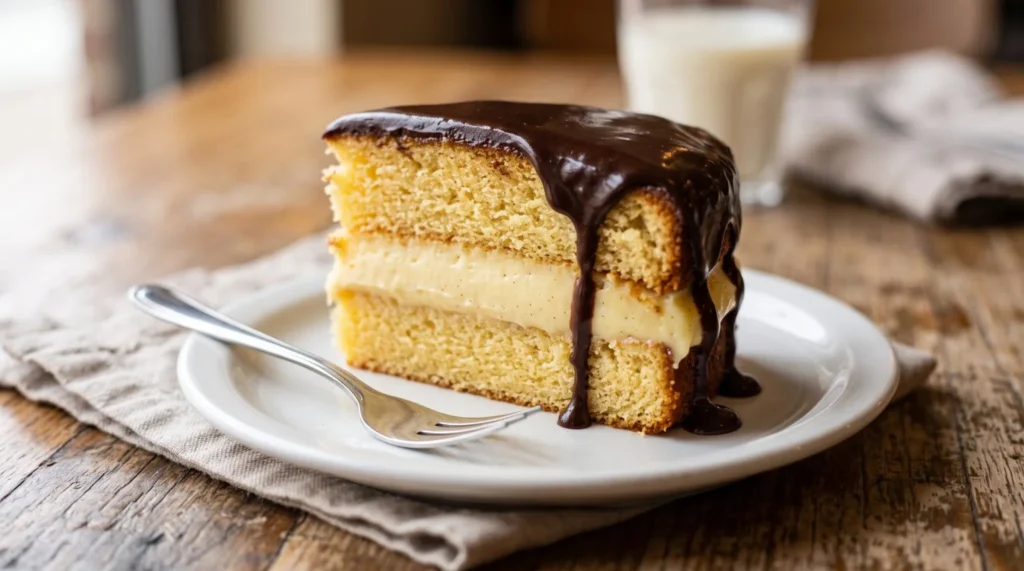
    Despite its name, Boston cream pie isn’t a pie at all — it’s two layers of sponge cake filled with vanilla custard and topped with a glossy chocolate glaze. The confusion dates back to the 1800s, when cakes and pies were often baked in the same pans and the names were used somewhat interchangeably. The dessert is credited to a French chef at Boston’s Parker House Hotel in 1856, and it became popular enough that Massachusetts named it the official state dessert in 1996.

    What You’ll Need

    For the cake:

    • 1½ cups all-purpose flour
    • 1½ teaspoons baking powder
    • ½ teaspoon salt
    • ½ cup unsalted butter, softened
    • 1 cup sugar
    • 2 eggs
    • 1 teaspoon vanilla extract
    • ¾ cup milk

    For the filling and glaze:

    • 2 cups milk
    • ½ cup sugar
    • ¼ cup cornstarch
    • 4 egg yolks
    • 1 teaspoon vanilla extract
    • 4 oz semisweet chocolate, chopped
    • ½ cup heavy cream

    How to Make It

    1. Cream the butter and sugar, beat in the eggs and vanilla, then alternate adding the flour mixture and milk. Divide between two greased 8-inch round pans and bake at 350°F for 20–25 minutes. Cool completely.
    2. For the custard, whisk the milk, sugar, cornstarch, and egg yolks in a saucepan over medium heat until thickened. Stir in vanilla, then chill.
    3. Place one cake layer on a plate, spread the custard on top, and add the second layer.
    4. Warm the cream, pour over the chopped chocolate, and stir until smooth. Pour the glaze over the top of the cake, letting it drip down the sides.

    Tips for a Better Boston Cream Pie

    Make sure the custard is fully chilled before assembling, or it will slide out from between the layers. Pour the glaze while it’s still warm and pourable for the smoothest, glossiest finish.

  • The Classic American Cheeseburger: A Taste of Backyard Tradition

    free app for traking food calories link here

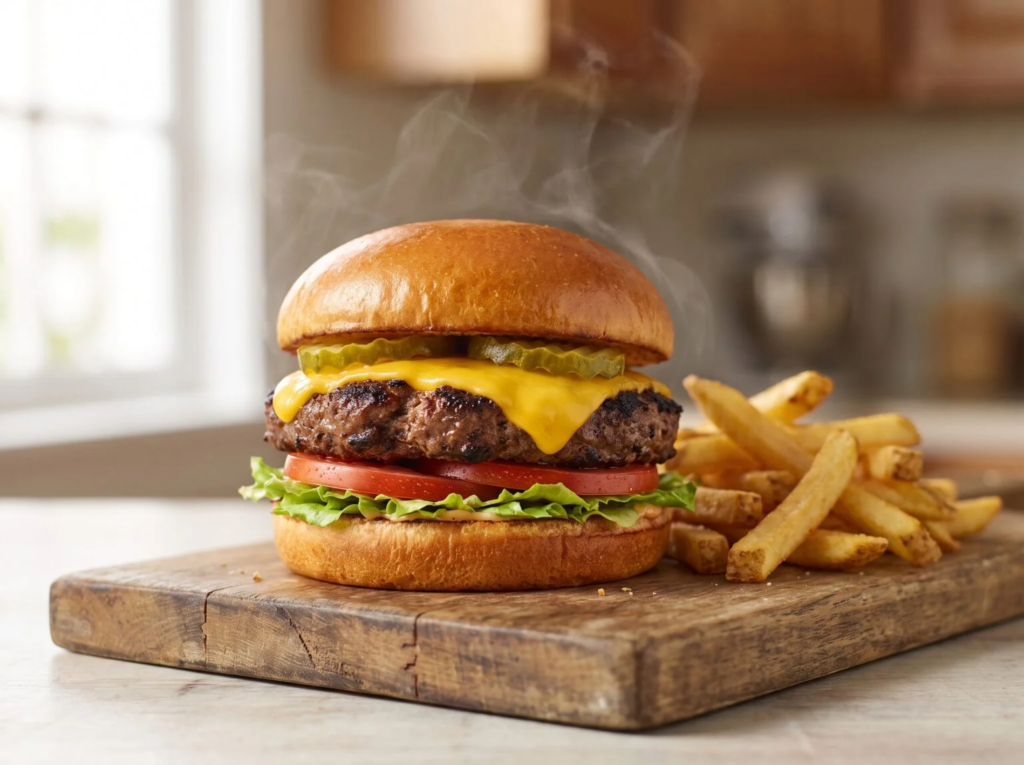
    The cheeseburger anchors backyard cookouts and roadside diners alike — simple in concept, yet endlessly debated over toppings, bun choice, and how to cook the patty. Its exact origin is disputed among a handful of diners across the country, including Louis’ Lunch in Connecticut and stands in Wisconsin and Oklahoma, all claiming to have served the first hamburger sandwich in the early 1900s. By the 1920s and 30s, chains like White Castle had made the burger cheap and widespread, and by mid-century, the cheeseburger — a burger with a slice of melted cheese — was the default order at drive-ins and cookouts everywhere. Today it’s less a fixed recipe than a canvas, but the fundamentals of a great burger stay the same.

    What You’ll Need

    • 1½ lbs ground beef (80/20 blend)
    • 4 slices American or sharp cheddar cheese
    • 4 hamburger buns
    • Salt and freshly ground black pepper
    • 1 tablespoon butter, softened
    • Lettuce, sliced tomato, red onion, pickles
    • Ketchup, mustard, mayonnaise, to taste

    How to Make It

    1. Divide the beef into four 6-oz patties, slightly wider than the buns since they’ll shrink. Press a shallow dimple in the center of each to stop them from puffing into a dome.
    2. Season both sides generously with salt and pepper right before cooking.
    3. Heat a cast-iron skillet or griddle until genuinely hot. Sear the patties about 3 minutes without touching, letting a deep crust form.
    4. Flip once, top with cheese, and cook 2–3 minutes more. A splash of water and a lid for the final 30 seconds helps the cheese melt fast.
    5. Butter the cut sides of the buns and toast face-down until golden.
    6. Build the burger: bun, condiments, lettuce, patty with melted cheese, tomato, onion, pickles, top bun. Serve right away.

    Tips for a Better Burger

    Handle the ground beef as little as possible — overworking it squeezes out moisture and makes for a tougher bite. A hot, heavy pan matters more than fancy equipment; you want a real sear, not a gray, steamed patty. Let the burger rest a minute once it’s off the heat so the juices settle back in. Whether dressed up with bacon and blue cheese or kept plain the way a kid would order it, that flexibility is exactly why the cheeseburger remains one of the most-ordered dishes in the country.

  • New England Clam Chowder: A Bowl of Coastal Comfort

    free app for traking food calories link here

    Along the rocky coast of New England, chowder has been a staple for as long as fishing boats have come back to shore. The word likely comes from the French “chaudière,” a cooking pot brought by early settlers to Quebec and the Maritimes, from where the tradition spread south. Fishing families built chowder from whatever was on hand — salt pork, potatoes, onions, and cheap, abundant clams. The cream-based “New England style” took shape over the 1800s, distinct from the tomato-based “Manhattan style” further south, a rivalry serious enough that Maine once considered banning tomatoes in chowder within state lines.

    What You’ll Need

    • 4 slices bacon or 4 oz salt pork, diced
    • 1 onion, diced
    • 2 celery stalks, diced
    • 1½ lbs potatoes, cubed
    • 2 cups clam juice
    • 3 tablespoons flour
    • 2 cups whole milk
    • 1 cup heavy cream
    • 2 (6.5 oz) cans chopped clams, juice reserved
    • 2 tablespoons butter
    • 1 teaspoon thyme, 1 bay leaf
    • Salt and pepper, to taste
    • Oyster crackers, for serving

    How to Make It

    1. Cook the bacon or salt pork until crisp; remove and set aside, keeping the fat in the pot.
    2. Add onion and celery, cook 5 minutes. Add potatoes, clam juice, thyme, and bay leaf; simmer 12–15 minutes until potatoes are tender.
    3. In a separate pan, melt butter, whisk in flour, then gradually whisk in milk until thickened.
    4. Stir the milk mixture into the pot with the cream. Keep at a gentle simmer — don’t boil, or the dairy can separate.
    5. Stir in the clams and reserved bacon; cook 3–4 minutes just until heated through.
    6. Season with salt and pepper, remove the bay leaf, and serve topped with oyster crackers.

    Tips for the Best Chowder

    Fresh clams give the richest flavor, but good canned clams work well for a weeknight. Keep the heat low once the dairy goes in — a hard boil is the most common way to ruin a pot of chowder. Many cooks find it tastes even better the next day, once the flavors have melded overnight in the fridge.

  • Louisiana Gumbo: The Soul of Cajun and Creole Cooking

    free app for traking food calories link here

    Gumbo captures Louisiana’s layered culinary history better than almost any other dish — a stew built from West African cooking techniques, French roux-making, Spanish seasoning, and Native American filé powder, all simmered together into something that belongs entirely to South Louisiana. The name likely comes from a West African word for okra, reflecting the influence of enslaved West African cooks, while French settlers contributed the slow-cooked roux that forms the backbone of most gumbo today. Ask ten cooks for their recipe and you’ll get ten different, fiercely defended answers.

    What You’ll Need

    • ½ cup vegetable oil
    • ½ cup all-purpose flour
    • 1 onion, 2 celery stalks, 1 green bell pepper, diced
    • 4 cloves garlic, minced
    • 12 oz andouille sausage, sliced
    • 1½ lbs boneless chicken thighs, cut into pieces
    • 6 cups chicken stock
    • 1 cup sliced okra, or 1 teaspoon filé powder
    • 2 bay leaves
    • 1 tablespoon Cajun seasoning
    • Salt and cayenne, to taste
    • Cooked white rice, green onions, and parsley, for serving

    How to Make It

    1. Heat the oil, whisk in the flour, and cook the roux, stirring constantly, for 30–45 minutes until deep chocolate-brown. Don’t rush this step.
    2. Add the onion, celery, bell pepper, and garlic; cook 5–7 minutes until softened.
    3. Add the sausage and cook a few minutes more.
    4. Gradually whisk in the stock. Add chicken, bay leaves, and Cajun seasoning. Simmer, uncovered, 45 minutes to an hour.
    5. Stir in okra during the last 20 minutes, or stir in filé powder off the heat right before serving.
    6. Adjust seasoning, remove bay leaves, and serve over rice with green onions and parsley.

    Tips for a Better Gumbo

    The roux is the make-or-break element — keep the heat moderate and stir often, since a burnt roux can’t be salvaged. Use okra or filé, not both, or the texture gets overly thick. Like most stews, gumbo tastes even better the next day, once the flavors have had time to deepen.

  • The Philly Cheesesteak: Philadelphia’s Iconic Sandwich

    free app for traking food calories link here

    Thin-sliced beef, melted cheese, a soft roll — the Philly cheesesteak has become one of the most recognizable regional sandwiches in the country. It traces back to Pat Olivieri, a hot dog vendor in South Philadelphia who, in the 1930s, grilled up chopped beef with onions on a whim and put it on a roll. The sandwich caught on with local cab drivers, and Pat’s King of Steaks was born. Cheese came later, in the 1940s, and a friendly rivalry has grown up ever since between Pat’s and Geno’s Steaks, which sit across the street from each other.

    What You’ll Need

    • 1 lb ribeye steak, very thinly sliced
    • 2 hoagie rolls, split
    • 4 slices provolone (or ½ cup Cheez Whiz)
    • 1 large onion, thinly sliced
    • 2 tablespoons vegetable oil
    • Salt and pepper, to taste

    How to Make It

    1. Heat 1 tablespoon oil on a griddle over medium heat. Cook the onions slowly until soft and lightly caramelized, about 10–12 minutes. Push to one side.
    2. Add the remaining oil, raise the heat to medium-high, and add the steak. Let it cook a minute, then chop it into smaller pieces with a spatula as it cooks.
    3. Mix the meat with the caramelized onions and season with salt and pepper.
    4. Divide into two portions, top with provolone and let it melt, or fold in Cheez Whiz directly.
    5. Scoop into the rolls and serve immediately, while hot.

    Tips for a Better Cheesesteak

    Freeze the steak for 30–45 minutes before slicing — it firms up the meat for cleaner, thinner cuts. Keep toppings minimal; the classic version lets the beef, cheese, and roll carry the dish. If you order one in Philadelphia, “wiz wit” means Cheez Whiz with onions, and leaving off “wit” means no onions at all.

  • Tex-Mex Chili con Carne: A Bowl of Bold, Smoky Flavor

    free app for traking food calories link here

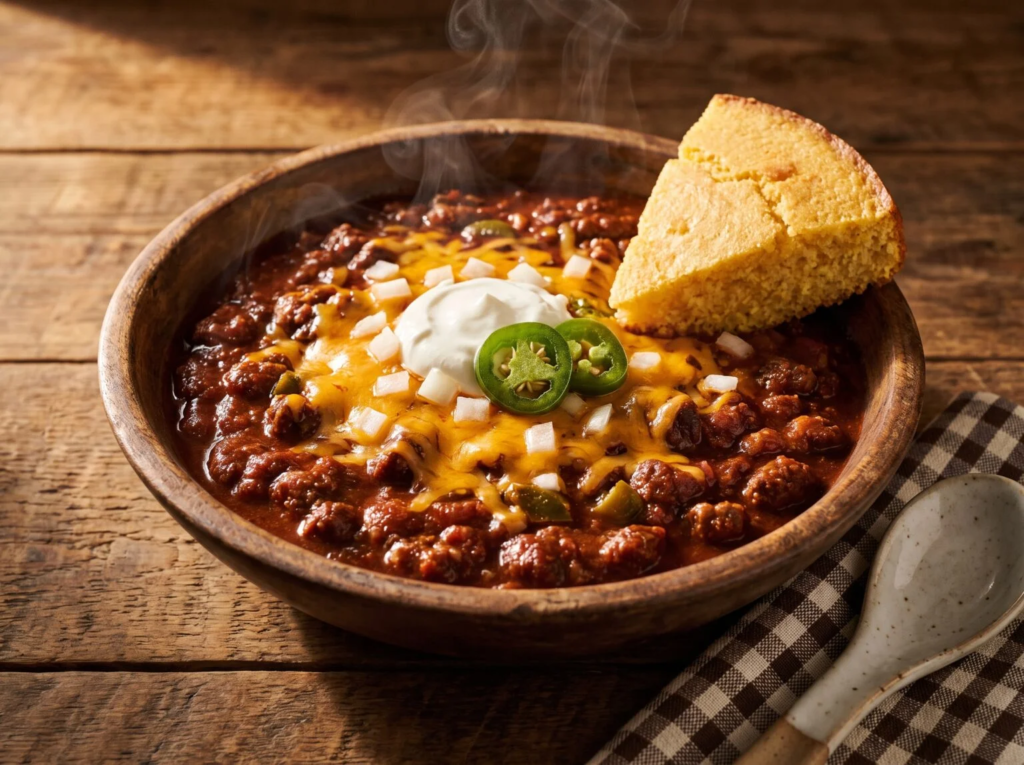
    Chili con carne — literally “chili with meat” — is one of the few dishes with an official state designation: Texas named it the state dish in 1977. Its roots trace to the “chili queens” of San Antonio, women who sold bowls of spiced meat stew from outdoor stalls in the mid-to-late 1800s, blending Mexican chili pepper traditions with Texas ranch country’s cattle-heavy food culture. From there, a genuine rift opened up: Texas purists insist “true” chili has no beans at all, while much of the country embraces bean-filled versions as the default.

    What You’ll Need

    • 2 lbs beef chuck, cubed (or ground beef)
    • 2 tablespoons vegetable oil
    • 1 onion, diced
    • 4 cloves garlic, minced
    • 3 tablespoons chili powder
    • 1½ teaspoons ground cumin
    • 1 teaspoon dried oregano
    • 2 cups beef broth
    • 2 tablespoons tomato paste
    • 1 tablespoon masa harina or cornmeal
    • Salt and cayenne, to taste
    • Optional: 1 can kidney or pinto beans
    • Cheese, onion, sour cream, jalapeños, for serving

    How to Make It

    1. Brown the beef in batches in the oil, then set aside.
    2. Cook the onion until softened, then add the garlic.
    3. Stir in the chili powder, cumin, and oregano, and cook briefly until fragrant.
    4. Return the beef to the pot with the broth and tomato paste. Simmer, covered, 1½–2 hours, until fork-tender.
    5. Mix the masa harina with water and stir in to thicken. Simmer 10 more minutes.
    6. Stir in beans if using, adjust seasoning, and serve with toppings.

    Tips for Better Chili

    Low and slow is the guiding principle — rushing the simmer leaves the beef tough. Chili tends to taste even better the next day. In Texas, it’s often ladled over a split bag of corn chips with cheese and onion, known as “Frito pie.”

  • Buffalo Chicken Wings: Born in a Bar, Beloved Everywhere

    free app for traking food calories link here

    Buffalo wings have an unusually precise origin story. In 1964, Teressa Bellissimo, co-owner of the Anchor Bar in Buffalo, New York, needed a late-night snack for her son and his friends. She deep-fried chicken wings — then a low-value cut used mostly for stock — tossed them in hot sauce and butter, and served them with celery and blue cheese dressing. The combination was an instant hit, and it spread nationally through the 1980s and 90s to become a fixture of sports bars and Super Bowl parties everywhere.

    What You’ll Need

    • 2 lbs chicken wings, split into flats and drumettes
    • 1 tablespoon baking powder
    • Salt, to taste
    • ½ cup hot sauce (Frank’s RedHot)
    • 4 tablespoons unsalted butter
    • 1 tablespoon white vinegar
    • ¼ teaspoon garlic powder
    • Celery and carrot sticks, blue cheese or ranch, for serving

    How to Make It

    1. Pat the wings very dry, then toss with baking powder and salt.
    2. Arrange on a wire rack over a baking sheet and refrigerate, uncovered, at least 1 hour.
    3. Bake at 425°F for 45–50 minutes, flipping halfway, until deeply golden and crisp.
    4. Melt the butter and whisk in the hot sauce, vinegar, and garlic powder.
    5. Toss the hot wings in the sauce until evenly coated.
    6. Serve immediately with celery, carrots, and blue cheese or ranch.

    Tips for Better Wings

    The baking powder trick (not baking soda) is key to crispy oven-baked skin without frying. Don’t sauce the wings until right before serving, or they’ll soften. Blue cheese is the traditional Buffalo pairing, though ranch has become just as popular elsewhere — a matter of regional loyalty more than anything else.

  • Classic Mac and Cheese: Ultimate American Comfort Food

    free app for traking food calories link here

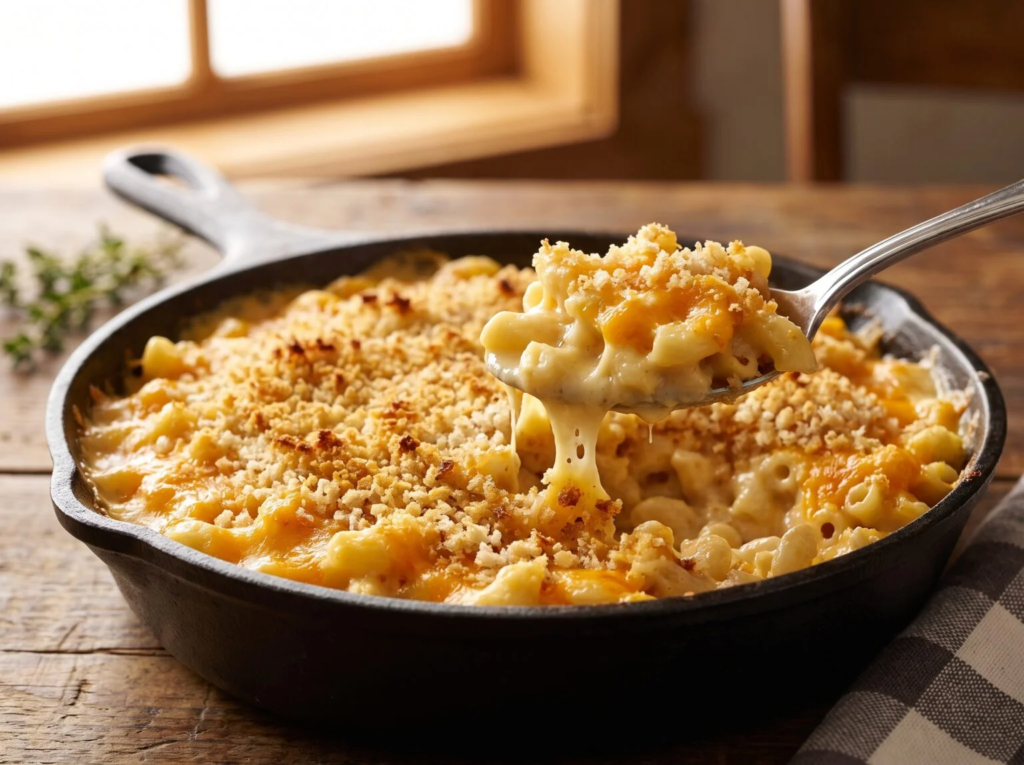
    Macaroni and cheese holds a dual identity in American food culture: a nostalgic staple from a blue box, and a dish serious cooks fuss over for the perfect creamy sauce. Its American history is often linked to Thomas Jefferson, who encountered pasta in Europe and helped popularize macaroni after returning from France in the 1780s. But the dish truly became a household staple during the Great Depression, when Kraft introduced its boxed version in 1937 — a shelf-stable meal that could feed a family for pennies.

    What You’ll Need

    • 1 lb elbow macaroni
    • 4 tablespoons butter
    • ¼ cup all-purpose flour
    • 3 cups whole milk
    • 1 teaspoon dry mustard powder
    • ½ teaspoon paprika
    • 3 cups shredded sharp cheddar
    • 1 cup shredded Gruyère or Monterey Jack
    • Salt and pepper, to taste
    • Optional: buttered breadcrumbs, for topping

    How to Make It

    1. Cook the macaroni until just al dente; drain.
    2. Melt the butter, whisk in the flour, and cook a minute to form a roux.
    3. Gradually whisk in the milk, cooking until thickened enough to coat a spoon.
    4. Off the heat, stir in the mustard powder and paprika, then the cheeses, a handful at a time, until melted and smooth.
    5. Fold in the macaroni and season with salt and pepper.
    6. For a baked version, top with breadcrumbs and bake at 375°F for 20–25 minutes until golden. Otherwise, serve straight from the pot.

    Tips for a Better Mac and Cheese

    Shred your own cheese from a block — pre-shredded bags have an anti-caking coating that can leave the sauce grainy. Keep the heat low once the cheese goes in. A blend of a sharp cheese for flavor and a good melter like Gruyère gives the smoothest, best-tasting result.

  • Classic Apple Pie: As American As It Gets

    free app for traking food calories link here

    The phrase “as American as apple pie” is so familiar it’s easy to forget the dish didn’t originate in America at all — apples aren’t native to North America, and pie-making came over with English and Dutch settlers. What America did was turn it into a symbol of home and national identity, one repeated everywhere from Fourth of July tables to World War II soldiers saying they were fighting “for mom and apple pie.” Early versions were less sweet than today’s, since sugar was expensive; as it became more accessible, the pie evolved into the cinnamon-spiced dessert most people picture now.

    What You’ll Need

    For the crust:

    • 2½ cups all-purpose flour
    • 1 teaspoon salt, 1 tablespoon sugar
    • 1 cup cold unsalted butter, cubed
    • 6–8 tablespoons ice water

    For the filling:

    • 6–7 medium apples (tart and sweet varieties mixed)
    • ¾ cup granulated sugar
    • 2 tablespoons flour or cornstarch
    • 1 teaspoon cinnamon, ¼ teaspoon nutmeg
    • 1 tablespoon lemon juice
    • 2 tablespoons butter, cut into pieces
    • 1 egg, beaten; coarse sugar, for topping

    How to Make It

    1. Whisk the flour, salt, and sugar; cut in the cold butter until crumbly. Add ice water until the dough comes together. Divide, chill at least 1 hour.
    2. Peel and slice the apples; toss with sugar, flour, cinnamon, nutmeg, and lemon juice.
    3. Roll out one disc and fit into a 9-inch pie dish. Add the filling and dot with butter.
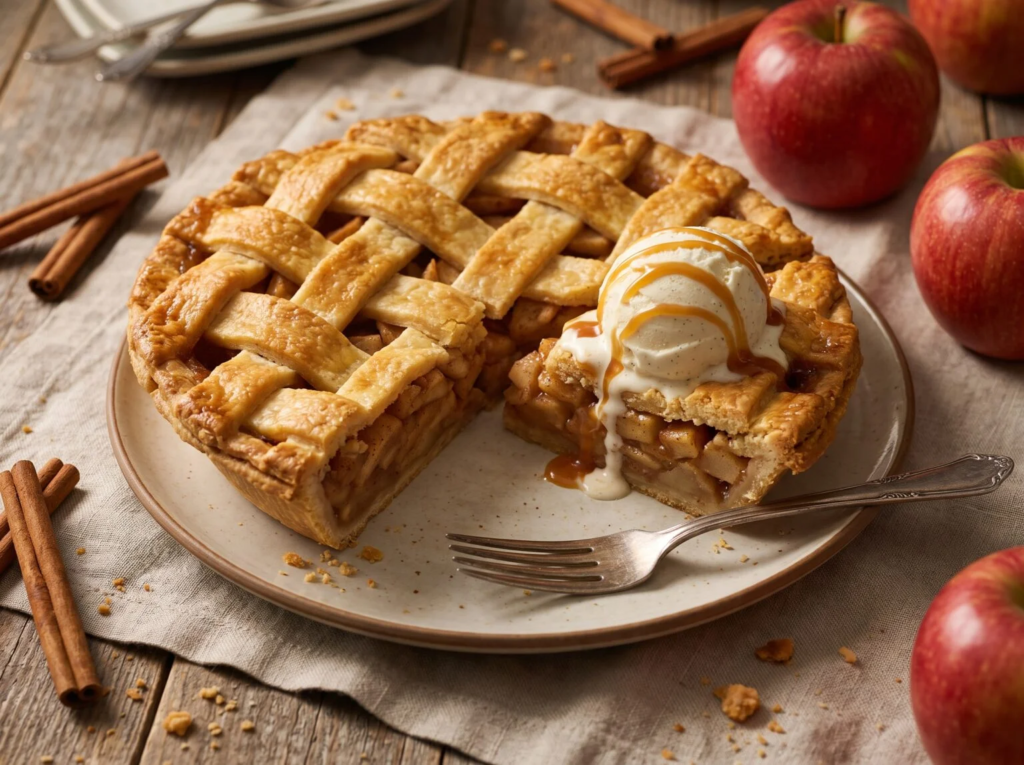
    4. Top with the second rolled-out disc, vented or in a lattice. Crimp the edges, brush with egg, and sprinkle with sugar.
    5. Bake at 425°F for 20 minutes, then 375°F for 35–40 minutes more, until deep golden and bubbling.
    6. Cool at least 2–3 hours before slicing, so the filling sets.

    Tips for a Better Pie

    Keep everything cold — the butter, the water, even the bowl — since cold fat is what creates flaky layers. Mixing apple varieties gives more complex flavor and texture than using just one. Serve with vanilla ice cream for pie à la mode, a pairing that’s become a tradition of its own.

  • The Reuben Sandwich: A Deli Classic Built on Contrast

    free app for traking food calories link here

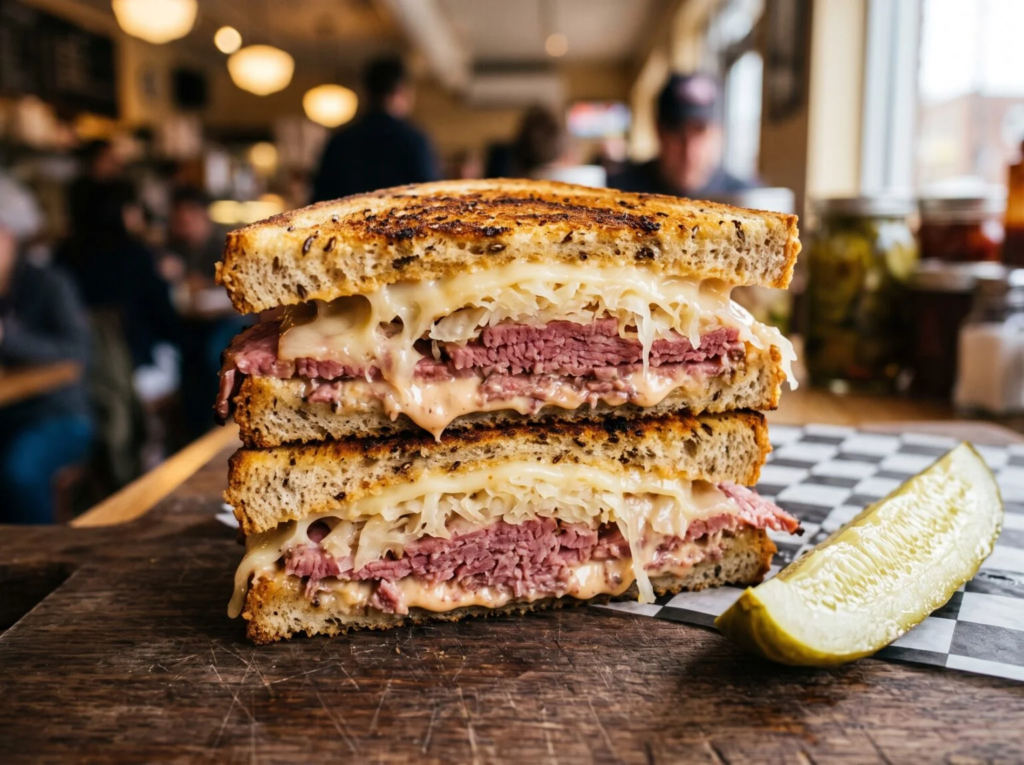
    The Reuben layers corned beef, melted Swiss cheese, sauerkraut, and Russian dressing between two slices of grilled rye bread — a combination that shouldn’t work as well as it does, balancing salty, tangy, creamy, and rich in every bite. Its origin is disputed between two competing stories: one credits Arnold Reuben, a New York deli owner, in the early 1900s, while the other points to Reuben Kulakofsky, a grocer in Omaha, Nebraska, who is said to have created it for a poker game in the 1920s. Both cities still claim the sandwich as their own.

    What You’ll Need

    • 8 slices rye bread
    • 1 lb corned beef, thinly sliced
    • 8 slices Swiss cheese
    • 1½ cups sauerkraut, drained well
    • ½ cup Russian or Thousand Island dressing
    • 4 tablespoons butter, softened

    How to Make It

    1. Warm the corned beef gently in a skillet or microwave so it’s ready to melt the cheese.
    2. Butter one side of each bread slice. On the unbuttered side, layer dressing, a slice of Swiss, corned beef, sauerkraut, another slice of Swiss, and more dressing, then close with the second slice, buttered side out.
    3. Grill in a skillet or on a griddle over medium heat, pressing gently, until golden brown on both sides and the cheese is fully melted, about 3–4 minutes per side.
    4. Slice diagonally and serve hot, ideally with a pickle spear on the side.

    Tips for a Better Reuben

    Drain the sauerkraut thoroughly, or the bread will turn soggy fast. Keep the heat moderate so the bread toasts through without burning before the center warms up — a lid over the pan for the last minute helps the cheese melt evenly. Some delis swap in pastrami and call it a Rachel; either way, the technique stays the same.